

Instruction: "How to create plugin project"
To develop a plugin, you will need an IDE with support for C# programming language. This instruction was created using VisualStudio.
You will also need dotnet CLI installed.
If you have already used plugins for the platform, the instructions for creating plugins based on
iBackendPlugincan be found here
Implementation
MEF.DEV platform supports an architectural style of REST development where you can create methods to support your requirements. It is important to follow minimal rules when implementing methods. The implementation of a method should be marked with attributes that are subclasses of HttpMethodAttribute and optionally with the RouteAttribute attribute if there are multiple methods of the same type.
It is important to understand that the platform provides simplified access to parts of the HttpContext by providing the ability to implement commonly known properties, namely HttpRequest and HttpResponse, which provide access to headers, query parameters, and more. Additionally, by implementing the IApiContext property, you can access the platform context, providing information about plugin configuration, user, tenant, and other available services in the tenant (sending messages, etc.).
To let the MEF.DEV platform know which class to use for request deserialization, you use the ExportAttribute, attribute, which designates the class as an export (for example, restresource below).
It's important to note that during plugin registration in the platform, the project's name is used, specifically the Assembly name (for example, TestPlugin below).
You can create a plugin using this instruction, or you can use an existing example by following this link: backend-template.
Project Creation
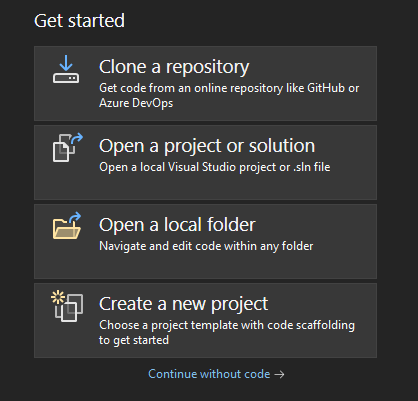
To begin, you need to create a new project. Select Create a new project
 |
|---|
Also, choose Class library and the С# programming language:
 |
|---|
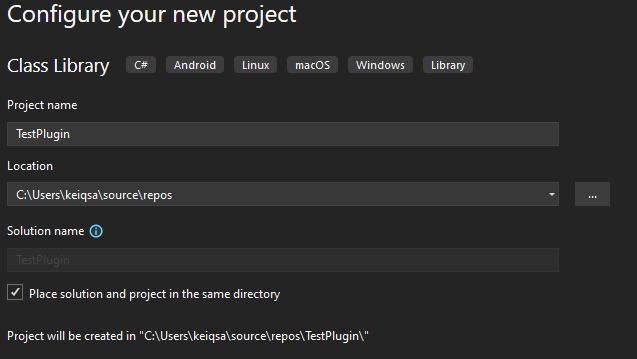
Configure the new project:
- Specify the Project Name
- Set the location where it will be saved in Location
- Check the box to save the solution in the same folder as the project:
 |
|---|
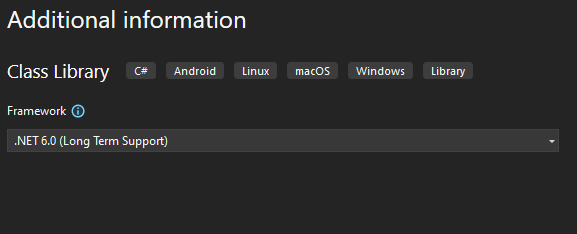
Under additional information, it is recommended to select the .NET(Long Term Support) version:
 |
|---|
Creating the Plugin Class
Adding a Class
A plugin implementation can include multiple classes that are exported, thereby providing separate RestResource
namespace TestPlugin;
public class RestResource
{

}
Adding NuGet Dependencies and the Export Attribute.
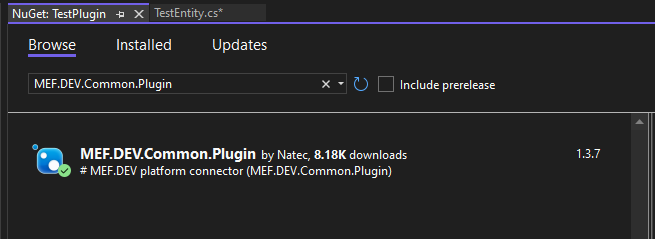
Search for the MEF.DEV.Common.Plugin extension and install it:
 |
|---|
using System.Composition;
using UCP.Common.Plugin;

namespace TestPlugin;

[Export("restresource", typeof(IControllerPlugin))]
public class RestResource
Implementing Interface Members
using Microsoft.AspNetCore.Http;
using Microsoft.AspNetCore.Mvc;

public class RestResource : IControllerPlugin
{
    private HttpRequest _request;
    private HttpResponse _response;
    private IApiContext _apiContext;

    public HttpRequest Request
    {
        get => _request;
        set => _request = value;
    }
    public HttpResponse Response
    {
        get => _response;
        set => _response = value;
    }
    public IApiContext ApiContext
    {
        get => _apiContext;
        set => _apiContext = value;
    }
Creating the "create-item" Method
It's important to note that the request and response models can be customized to your requirements.
[HttpGet, Route("{id}")]
public DataResponseModel GetItem([FromRoute] long id)
{
    // How to get service configuration
    var configProvider = _apiContext.ServiceProvider().GetService<IControllerPluginConfigProvider>();
    var configuration = configProvider!.Get<IConfigurationRoot>();

    return new DataResponseModel
    {
        Id = id,
        Name = configuration?.GetSection("myurl").Value,
        IsComplete = true
    };
}

[HttpPost, Route("create-item")]
public object CreateItem(
    [FromHeader] string lastModified,
    [FromQuery] string lang,
    [FromBody] DataRequestModel model
    )
{
    return new List<DataResponseModel>
    {
        new()
        {
            Name = model.Name,
            LastModified = lastModified,
            Lang = lang
        }
    };
}

public class DataRequestModel
{
    public long Id
    {
        get; set;
    }
    public string Name
    {
        get; set;
    }
}

public class DataResponseModel
{
    public long Id
    {
        get; set;
    }
    public string Name
    {
        get; set;
    }
    public bool IsComplete
    {
        get; set;
    }
    public string LastModified
    {
        get; set;
    }
    public string Lang
    {
        get; set;
    }
}
Populating the Swagger Specification
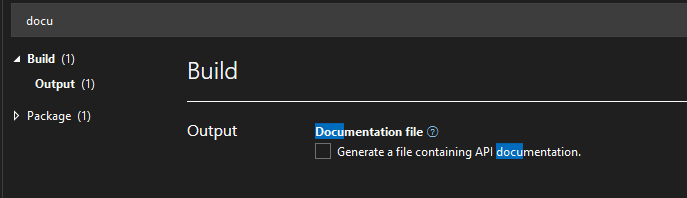
This step is optional but necessary for generating documentation using Swagger.
Activating the Documentation File Checkbox
Check the box to generate a file containing the API documentation
 |
|---|
Alternatively, you can add the following code to your project file:
<PropertyGroup>
<GenerateDocumentationFile>true</GenerateDocumentationFile>
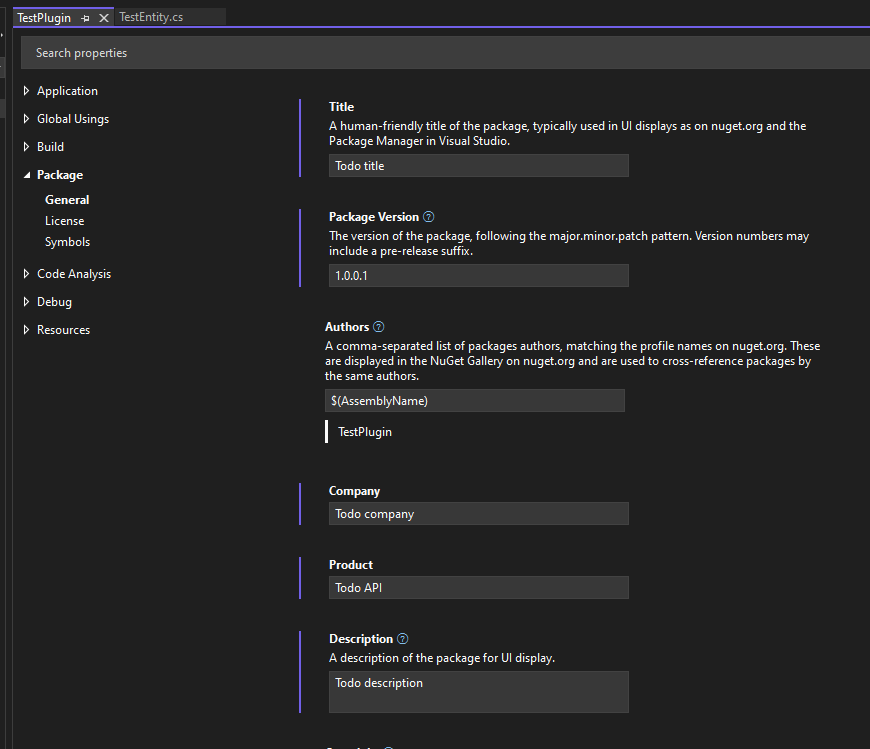
</PropertyGroup>Filling in the Main Plugin Information
Fill in the necessary information for your plugin:
 |
|---|
Alternatively, you can add the following code to your project file:
<PropertyGroup>
    <Title>Todo title</Title>
    <Version>1.0.0.1</Version>
    <Company>Author</Company>
    <Product>Todo API</Product>
    <Description>Todo description</Description>
</PropertyGroup>
Filling in Method Information
To associate models with method responses, add the Consumes and Produces attributes:
[ProducesResponseType(typeof(List<DataRequestModel>), StatusCodes.Status200OK)]
[ProducesResponseType(typeof(DataResponseModel), StatusCodes.Status500InternalServerError)]
// [Consumes("application/json")] // http REQUEST content-type, application/json by default
// [Produces("application/json")] // http RESPONSE content-type, application/json by default
Adding Method Description and Examples Using XML Comments
The documentation that will be displayed during generation:
/// <summary>
///     Create Todo item short description
/// </summary>
/// <remarks>
///     Create Todo item long description
/// </remarks>
/// <param name="id"></param>
/// <param name='model'
///     examples='{
///         "UNKNOWN_CONTEXT": {
///             "summary": "Unknown Service Context",
///             "description": "The request failed completely due to an unknown service context value",
///             "value": {
///                "cause": "CHARGING_FAILED",
///                "title": "Incomplete or erroneous session or subscriber information",
///                "invalidParams": [
///                     {
///                         "param": "/serviceRating/0/serviceContextId",
///                         "reason": "unknown context"
///                     }
///                 ]
///             }
///         },
///         "UNKNOWN_RESPONSE_CODE": {
///             "summary": "Unknown Response Code",
///             "description": "Internal Error",
///             "value": "405"
///         }
///     }'
/// >
///     DataRequestModel model for Create item
/// </param>
/// <param name="lastModified"></param>
/// <param name="lang"></param>
/// <response code='200'
///     example='{
///         "id": 1,
///         "name": "walk dog",
///         "isComplete": true
///     }'
/// >
///     Success
/// </response>
/// <response code='500'
///     examples='{
///         "UNKNOWN_CONTEXT": {
///             "summary": "Unknown Service Context",
///             "description": "The request failed completely due to an unknown service context value",
///             "value": {
///                "cause": "CHARGING_FAILED",
///                "title": "Incomplete or erroneous session or subscriber information",
///                "invalidParams": [
///                     {
///                         "param": "/serviceRating/0/serviceContextId",
///                         "reason": "unknown context"
///                     }
///                 ]
///             }
///         },
///         "UNKNOWN_RESPONSE_CODE": {
///             "summary": "Unknown Response Code",
///             "description": "Internal Error",
///             "value": "405"
///         }
///     }'
///     headers='{
///         "Last-Modified":{
///             "description": "",
///             "schema": {
///                 "type": "string",
///                 "example": "2019-06-09T15:56:13.8498013Z"
///             }
///         }
///     }'
/// >
///     Error
/// </response>
Plugin Configuration
This step is optional but important for obtaining dynamic configuration (depending on the tenant). You need to implement the IPluginConfig interface, for example:
using System.Composition;
using UCP.Common.Plugin.Models.Config;
namespace TestPlugin;
[Export("config", typeof(IPluginConfig))]
public class ConfigPlugin : IPluginConfig
{
public static class Keys
{
internal static string Connection = "Connection";
internal static string UiParameters = "UiParameters";
internal static string Logic = "Logic";
internal static string Report = "Report";
}
private readonly Dictionary<string, IEnumerable<PluginConfigSetting>> _configDictionary = new()
{
{ Keys.Connection, GetConnectionSection() }
};
public IDictionary<string, IEnumerable<PluginConfigSetting>> Get()
{
return _configDictionary;
}
public IDictionary<string, IEnumerable<PluginConfigSetting>> Set(IDictionary<string, IEnumerable<PluginConfigSetting>> config)
{
throw new NotImplementedException();
}
private static IEnumerable<PluginConfigSetting> GetConnectionSection()
{
yield return new PluginConfigSetting()
{
SettingType = PluginConfigSettingType.LongText,
Name = "ExampleName",
Value = @"{
""ConnectionStrings"": {
""ConnectionString"": ""Server=sqlserver;Database=database;User ID=userid;Password=password;Trusted_Connection=No"",
},
""DebugLevel"" : ""Trace""}"
};
yield break;
}
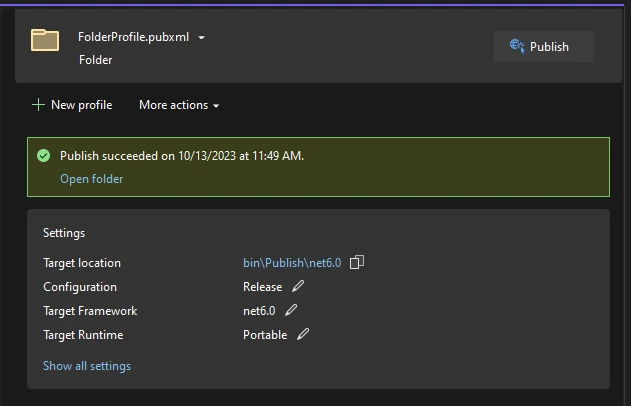
}Package Build
Make a portable build and publish the package with the self-contained option as shown in the screenshot below or using the command example below:
 |
|---|
dotnet publish -c Release -r portable -p:PublishDir=bin\Publish\net6.0 --no-self-containedPackage Registration
Go to the plugin creation page.
 |
|---|
This page is located in the "Plugins" menu. Then, proceed to the plugin creation page.
In the Alias field, enter the subject area name of the plugin (in our case it is test), and in the Name field enter the plugin name (in our case it is portal-test). Choose the Service type, which corresponds to a plugin containing only the API component without custom configuration. Enter the name of your project from the repository, and click Save.
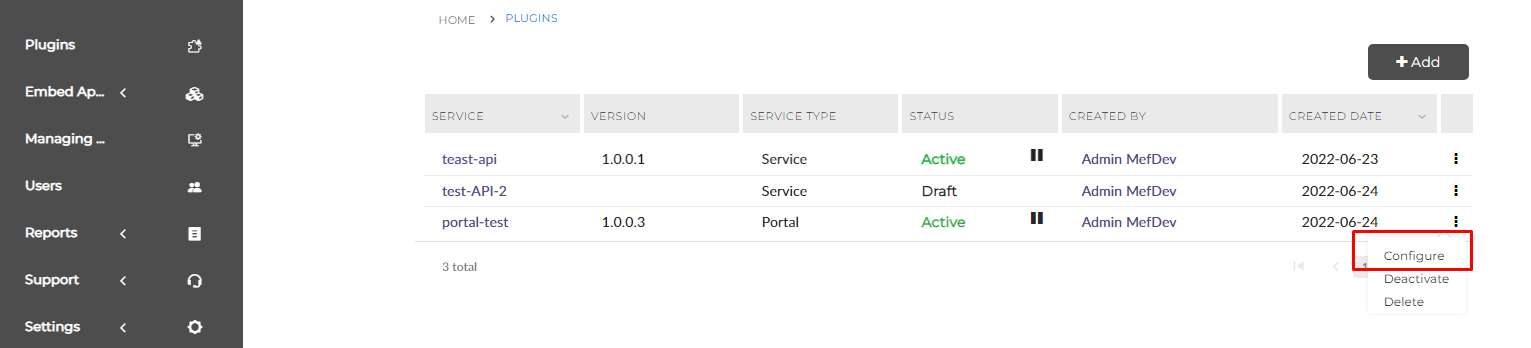
Uploading Package Version
To upload a ready-made ZIP-archive of the plugin to the mef.dev technical preview, go to the plugin configuration page in the Backend block and click the Upload New Version button.
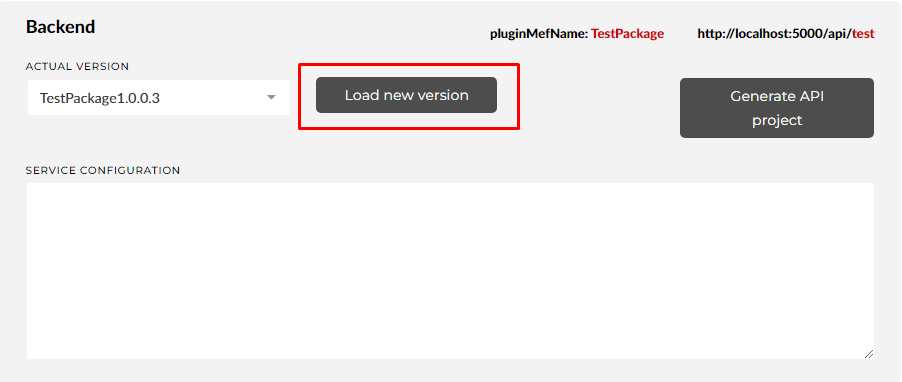 |
|---|
Select the necessary version and click Save.
Alternatively, you can upload the plugin using the publish API method provided by the platform::
curl --location 'https://preview.mef.dev/api/v2/plugins/<alias>/<PluginMefName>/publish' \
--header 'Authorization: Basic userpass' \
--form 'file=@"/local-path/to/file"' \
--form 'updateVersion="true"' \
--form 'updateTenantVersion="true"'
Important to note, that if you use the publish API method, you have to add the mandatory metadata.json file with example content below:
{
   "name":"TestPlugin Name",
   "serviceType":"API",
   "description":"This TestPlugin is used for tutorial goals under MIT license.",
   "dependencies":[],
   "config":{
      "routesUI":[]
   },
   "externalUrl":"https://opensource.org/license/mit",
   "configuration":null
}
There are several optional files for this way of publish to support the platfroms marketplace requirements (https://preview.mef.dev/store), namely:
description.htmlhuman readable description of your pluginsmall.pngpicture of your plugin within the dependency visualisationstandard.pngsquare picture of your plugin within the platfroms marketplace
These files have to be added into project with the additional property copy to output directory = copy if never
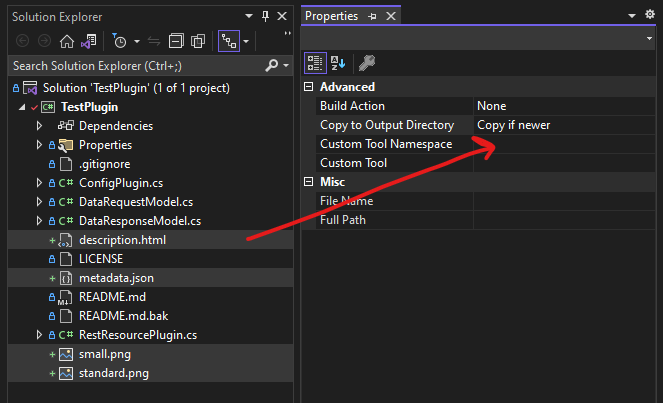 |
|---|
Package Dry run
To check the functionality of the plugin's API, you can use packet sniffer programs like Postman.
For sending requests, you need to authenticate, typically using the token-based authentication in the platform. However, for testing, you can use Basic Auth. You can create the necessary login-password pair for Basic Auth access to the API in the SETTINGS \ CREDENTIALS section of your profile, which can be accessed by clicking on the user icon in the upper right corner and selecting the SETTINGS menu. After clicking the ADD button, you can set the user login and password for Basic Auth.
Basic Health Check
Within the platform, there is an endpoint for checking the health of the plugin:
https://preview.mef.dev/api/v2/<alias>/plugins/<PluginMefName>/version.json?detaillevel=detailed |
|---|
If you get a similar result, your plugin has been successfully uploaded to the platform and is ready to work.
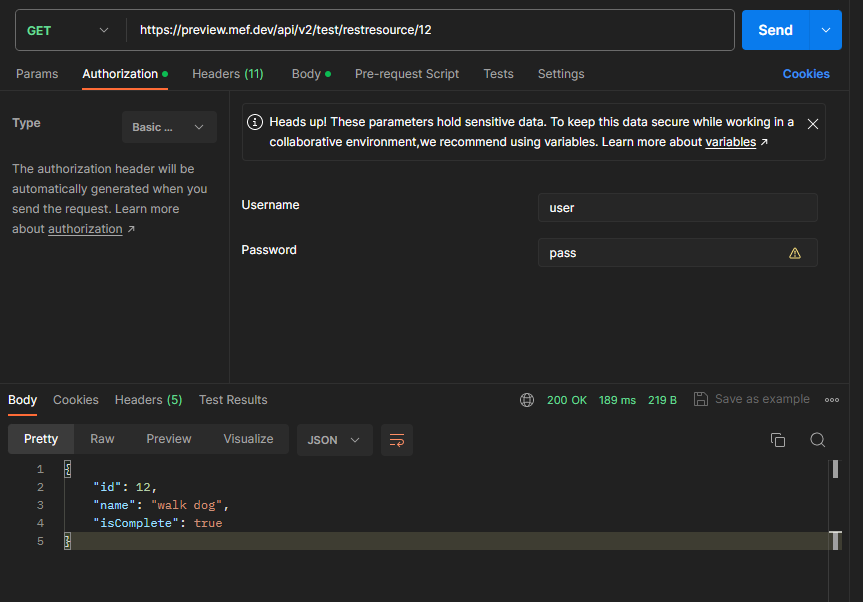
Sending Requests to the Plugin
Sending requests to the plugin will be demonstrated using GET requests.
To send requests, use the following template:
https://preview.mef.dev/api/v2/<alias>/<Export Name>You can add any parameters, headers, and fields to the request body, but make sure to reflect them in the input model of the plugin. Here's an example of a request:
curl --location --request GET 'https://preview.mef.dev/api/v2/test/restresource/1' \
--header 'authorization: Basic userpass' \
--header 'Content-Type: application/json'

curl --location --request POST 'https://preview.mef.dev/api/v2/test/restresource/create-item' \
--header 'authorization: Basic userpass' \
--header 'Content-Type: application/json' \
--data '{
    "name": "walk dog"
}' |
|---|
Useful Links:
GitHub repository link for the backend-plugin-example: https://github.com/mef-dev/tutorial-backend-plugin
The implementation of backend using by the Angular application is available also tutorial-ui-plugin