

Registration and uploading of packages
This instruction is intended for registering and uploading a UI plugin to the MEF.DEV platform. To do this, you need to be a registered user of the platform. If you're not registered, during your first login to mef.dev technical preview, you'll be given the opportunity to register based on your LinkedIn account.
According to the sequence below, we will be registering the sample plugin with minimal functionality of type Canvas. The process is similar for other types of plugins.
Package registration into platform
To begin, let's navigate to the plugin creation page, which can be found in the left menu under the Plugins section. This page is available on the mef.dev platform after the user logs in to mef.dev technical preview.
 |
|---|
Note: This functionality is only available to users with
DeveloperandDeveloper Adminroles.
After clicking the + Add button, we will be redirected to the plugin creation page. Here, we need to provide the following details for the new plugin:
- Alias: The alias represents the plugin's domain name, which is used to group plugins based on their functional purpose (logical group). It is important to note that plugin names cannot intersect within the same alias.
- Name: The name of the plugin. It should also be unique and not coincide with any other existing plugins on the platform.
After entering this information, we proceed to select the plugin type. In the current version of the platform, there are four main types of plugins. The purpose of each type and the differences between them are described in the green-colored help block.
Currently, we are interested in the Canvas type, which is a plugin that only contains a UI component. So, we select this type.
After selection, the Frontend block becomes active. It contains only one field, FrontendPluginName. This is the selector of the main module in the plugin. More details about it are explained in the guide on creating a plugin from scratch. We enter the example name, which is plugin-example, and click the Save button.
In case all fields are entered correctly, you will be redirected to the plugin configuration page.
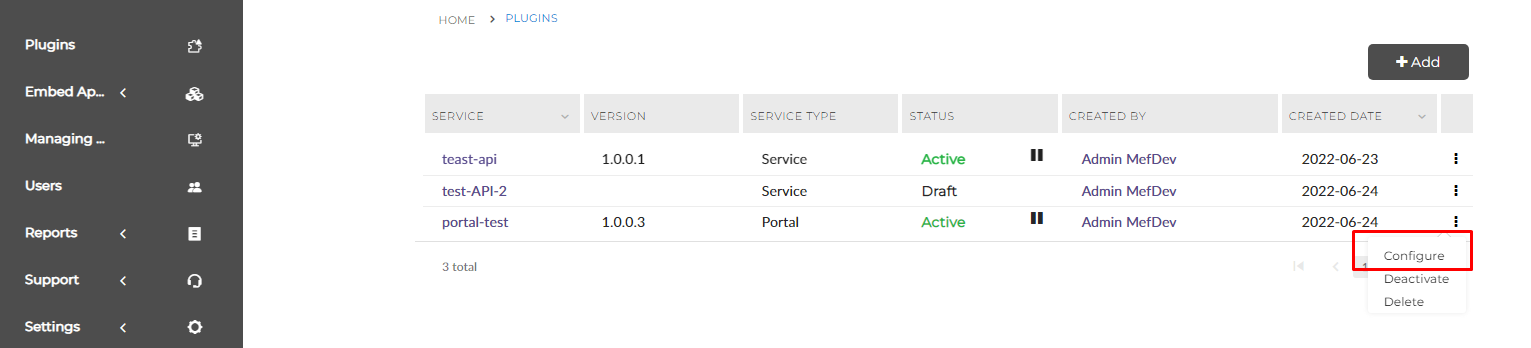
Note: In the future, you can access this page by clicking the Configure button in the plugin row located in the
Pluginsmenu.
 |
|---|
Configuration of package
In order for the plugin to work, you need to perform basic configuration before loading it.
General settings
These are just informational parameters that do not affect the operation of the plugin and are used only for displaying the plugin within the platform.
Dependencies settings
They are used when the plugin utilizes the functionality of other backend plugins already loaded on the platform, such as an API or a service.
Note: When adding dependencies, basic information about them will be passed to the UI plugin using @natec/mef-dev-platform-connector
Router Links settings
This applies only to Canvas and Portal plugins. It is necessary for defining pages within the plugin.
The platform reserves a set of pages within the plugin. To work properly, you need to specify the pages that the plugin will use.
Uploading version of package
Loading the first or a new version of the plugin is done in the Frontend block.
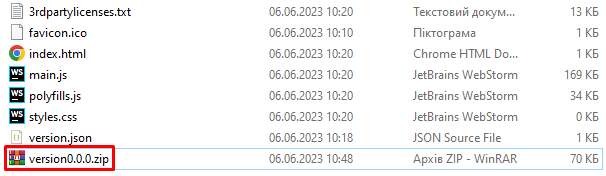
When clicking the button to upload, you need to select an archive of the compiled plugin content.This archive is the packaged content of the 'dist' folder.
After completing the guide for creating the first plugin, your dist folder should look something like this:
 |
|---|
Attention! The content should be placed at the root of the archive!
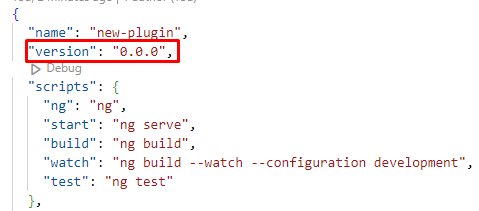
You cannot upload an already uploaded version of the plugin, so it's important to manage version numbers and update the application version in package.json.
 |
|---|
The combo box displays the current version that will be provided to the user by default when accessing the plugin.
In some usage scenarios, it may be desirable to access different versions simultaneously. Therefore, the platform allows for such capability throughout the plugin's lifecycle on the platform.
Possible platform upload erros
Here are some errors that you may encounter during the plugin uploading process on the platform:
| HTTP code | Message | Причина |
|---|---|---|
| 400 | File required | The "Empty File" error occurs when the uploaded archive file is empty or does not contain. |
| 403 | Access service denied | The "Access Denied" error occurs when the request to upload the plugin is rejected due to insufficient access rights. |
| 400 | Metadata is required | The "Missing metadata.json" error occurs when the uploaded archive does not contain the required metadata.json file. |
| 500 | The required file was not found: {pluginName}.dll | The "Missing {pluginName}.dll" error occurs when the uploaded archive does not contain the required {pluginName}.dll file. |
| 409 | Problem with upload. {ex.Message} | The "Unexpected error during copying" occurs when an unexpected error happens during the copying process of the plugin. |
| 409 : 200 | Version already exists | The "Conflict" error with the status code 409 occurs when a plugin with the same version already exists on the platform. |
| 500 | ServiceHost Unavailable | The "Unexpected Error During Document Generation" occurs when an unexpected error is encountered during the process of generating a document. |
| 409 | Does not match plugin name | The "PluginMefName Mismatch Error" occurs when the PluginMefName specified in the file does not match the name of the plugin configured in the system. |
| 404 | Entities not found | The "Missing Entities Error" occurs when the analysis of the plugin content fails to find any entities (exported business logic components). |
How to view your plugin on the platform
If you want to view your plugin within the mef.dev platform, navigate to the Embed Apps section in the menu. There you will find your plugin listed. By clicking on your plugin, you will be able to see it in action.
Additionally, you can publish your plugin in the
Storesection. To do this, you need to submit it for review first. You can do this in thePluginssection by finding your plugin, clicking on the three dots, and selecting the option labeledSend for inspection.
 |
|---|
If your plugin passes the review process conducted by the platform developers successfully, it will be added to the Store section.